Showing posts with label Sides. Show all posts

Tuesday, December 30, 2014

Shrimp Chip Dip


mouthwatering


     Yay for new years! I love New Years Eve, it brings a refreshing feeling,hope that you can make your life better. I normally don't share my goals for the upcoming months, but I'm going to need moral support on 2015's. I'm quitting sugar, I legitimately have a sugar addiction. 

But who cares about all the unrealistic resolutions?  The expectations we have  are hardly ever met, wishes a rarely granted,  and the dang muffin top never leaves.  All this talk about failing goals and quitting sugar is making me sad, Enough sad talk!   

  What really matters is food!

      The real reason why i love new years is the food! At any party, you're gonna find me at the food table. I don't have time to worry about my flaws when I'm hungry. Food is there for you. 

             One of our family favorites on new years, and the yearly super bowl,   is 
 shrimp chip dip.
looks odd, tastes great!
 My grandpa Nicki Black came up with this savory creation years ago, and it's stuck around and we've gobbled tons of this stuff. It's so good, i am actually doing a service by sharing the recipe.


Gather your needed ingredients,  a fork, and  a large mixing bowl.( milk is not pictured)
The miracle whip provides a nice, sweet, tangy taste. You  can improvise with Mayo is you like.


(I know it kinda looks gross). With the fork, smash the cream cheese, miracle whip, and milk together.
The cream cheese needs to be softened at room temp.
 If you are looking for a good arm workout, this gets your bicep nice and sore.
Don't use an electrical beater! The fork won't take all the clumps out and make it smooth like a beater will, but that's the point! You want everything to me mixed, but still have a chunky texture. Even if it looks kind of...disturbing..
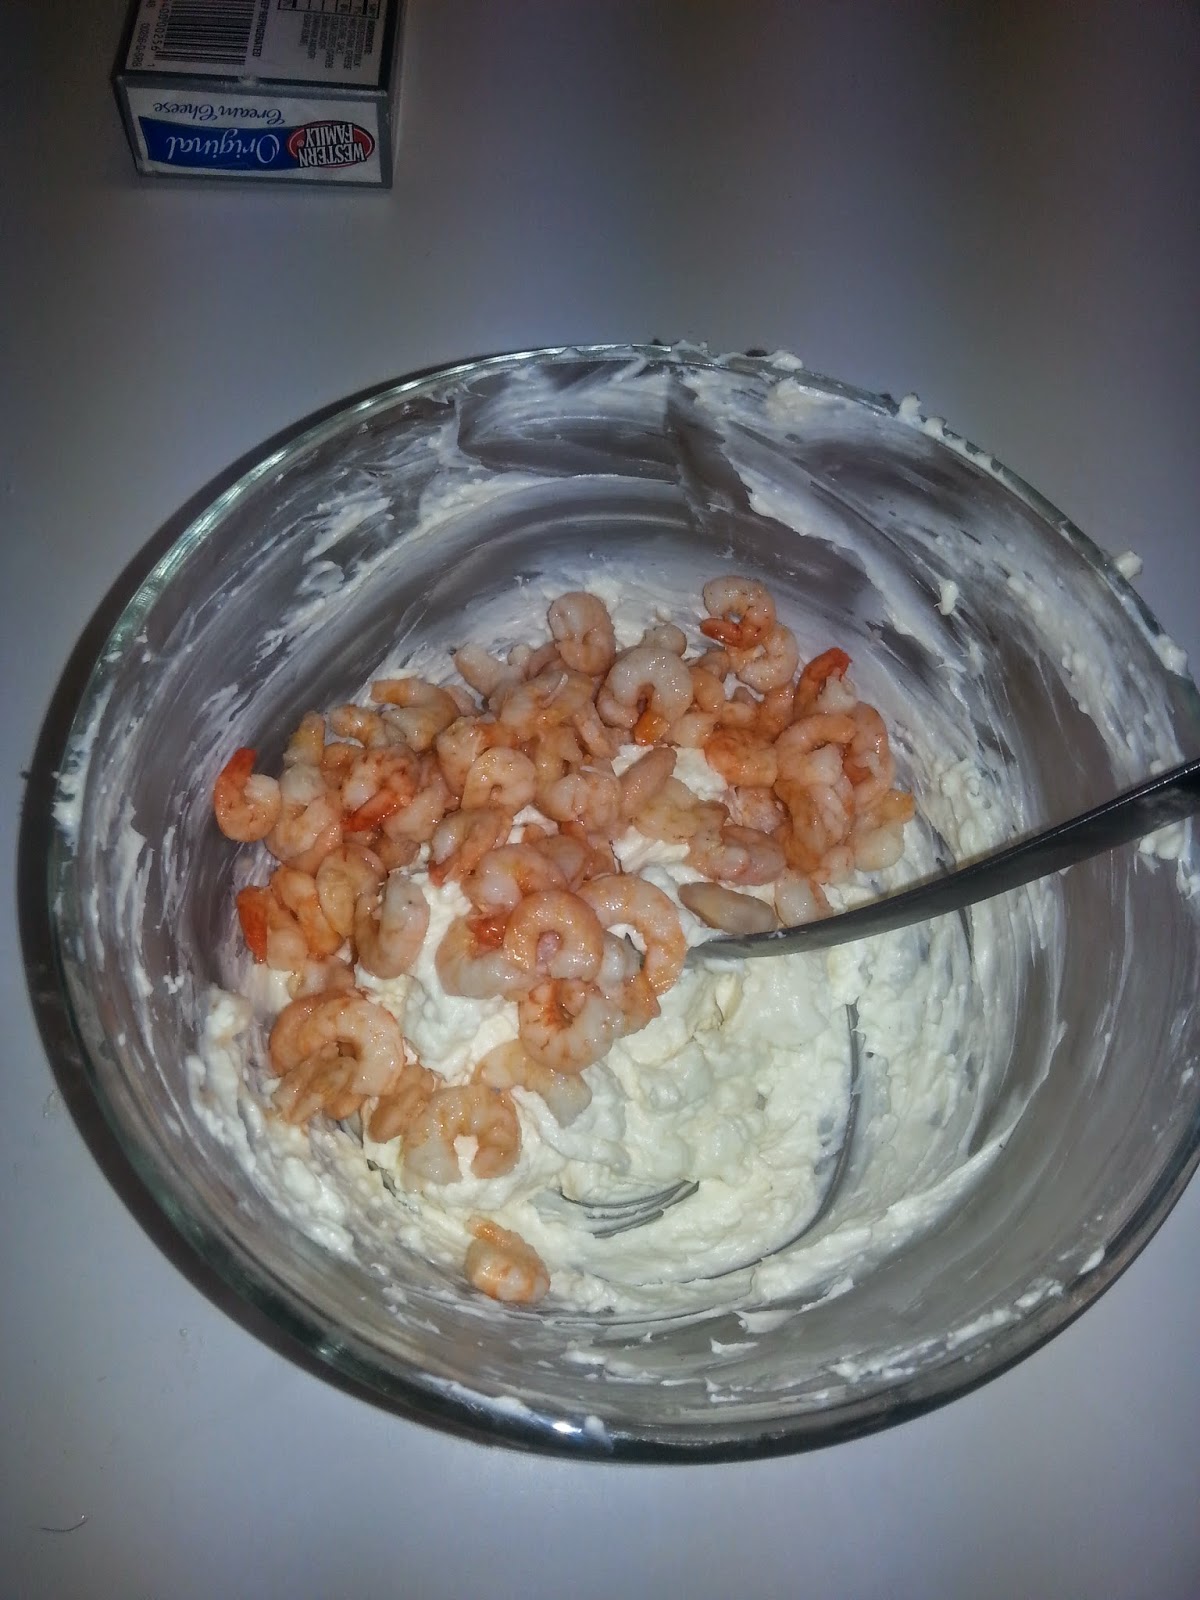
 Now, add you shrimp and onion salt.
  Mix it one last time and let the delicious dip chill in the fridge for a couple of hours.
  Chilling makes it nice and cold, and lets the flavors really combine well. 
             WARNING: the shrimp kind of smells like bad breath when you drain the juice, be brave!
                                                      The finished product! OH YAY!
 INDULGE
 The crunch of the salty chip with the creamy,  almost sweet  dip, makes perfection.
                         This will be you appetizer for every meal and your choice of snack until it's gone! 
ENJOY!
___________________________________________________________________________________
              Shrimp Chip Dip
  • a box of  8oz of cream cheese
  •  2 Tbs of Miracle Whip (or mayo)
  • 1 Tbs of milk
  • 6 oz can of mini shrimp
  • 1 tsp of onion salt 
Combine cream cheese, MW, and milk. Mash with fork
 until mixed, but still a little bit chunky.  Add shrimp, and onion salt.
 Let chill in fridge. Serve with wavy lays.  


-megan


Wednesday, September 25, 2013

Twice Baked Potatoes

Twice Baked Potatoes

#likebakedbutsomeonedidallthehardstufffirst
#somuchbetterthanhalfbaked
#weshouldalwaysworryaboutanythinghalfbaked
#freakinglovethesecreamycarbs
#ihavenoideawhathashtagsareevenfor


These were honkin' huge taters.  Half of one still makes a great big serving. You can use much smaller ones.  Cute little yukons or red.  
It's all good.


Scrub the dickens out of these puppies. I love potato skins - best part, so must be clean. I never use a veggie brush. What if someone forgot to mention they scrubbed the grunge out of the sink (or their nails) with it? Veggie brushes cannot be trusted.  Therefore, I always wad up a ball of foil, scrub, then toss. Works great.


Hold the little feller in a clean cloth - they are hot, even when they cool for a while. Take your time scooping out the matter.  Gotta have a good little shell to work with.  Make sure they are thoroughly baked or they won't mash up right and will be so much harder to scoop out!


Let's be honest. 
A potato is a mere vessel for which to hold wonderful things such as butter and cheese, gravy... and bacon. (These don't have bacon because I already had bacon in another part of the meal)

Twice Baked Potatoes
7 large potatoes
1 pint sour cream
3/4 cup butter
Salt - be generous here
6 cups grated cheddar cheese - divided (I used sharp)
1 pkg fresh chives, snipped with scissors

Scrub potatoes and wrap in foil.  Pierce to let steam out.  Bake until tender.  These big ones took 1 1/2 hours at 400 degrees.  Remove from oven and let cool slightly.  Carefully cut in half lengthwise.  Holding each half in a clean cloth, scoop out insides into a mixing bowl, leaving 1/4 inch rim of potato left.  

In mixing bowl, combine potato scoopings, butter, salt, 3 cups of the cheese, and 3/4 of the package of fresh chives.  Whip until smooth and fluffy. If you need more moisture, add a little milk or cream, but usually that much sour cream does it. 

Fill shells, top with remaining cheese, chives and if desired, add bacon.  

Bake at 350 for 25-30 minutes, uncovered.

NOTE:  Can be made ahead of time and refrigerated until final baking.  Just increase time if necessary.


Posted by: Rona

Tuesday, September 10, 2013

Tortellini Pasta Salad

Tortellini pasta salad
 
Beautiful, flavorful and best when made the day before.
 
This pasta salad is seriously missing nothing.  It's full of great ingredients that I almost always have on hand. It's a breeze to throw together and so convenient to be able to make the day before!


*Now when I made this, I did it for a huge crowd. Feel free to cut everything in half if it's just for your family.
 
Two bags of tortellini pasta
On the package, it says to boil for 6-7 minutes. I seriously boiled for maybe 2 minutes because I knew it would be sitting in the fridge overnight and would absorb liquid. Nobody likes a limp noodle. ;)
Drain pasta and immediately rinse with cool water so it quits cooking. Again, mushy pasta is gross.
 
2 cups of cubed, fresh mozzarella
1 cup halved, black olives. I'm sure green olives would be delicious also
2 cups halved grape tomatoes. (I had tomatoes from the garden so I used those instead, although grape tomatoes would probably be prettier).
1 jar of roughly chopped artichoke hearts
big handful of sliced green onions
1/2 cup grated parmesan cheese
Salt, pepper (don't skimp)
 
Place the pasta and all of the above ingredients in a large bowl.
 
Put 2 cups olive oil and about 3 HEAPING spoonful's of pesto in a mason jar. Shake it up.
You can use a store bought pesto or make your own, it's delicious both ways.
*I REALLY like basil and wanted more of that flavor then the pesto offers, plus I have oodles of it in my garden, so I rough chopped about 1/4 of a cup and added it in. Plus some to garnish, of course.
 
Toss together the Pasta mixture and the EVOO mixture.  Cover and refrigerate for at least 3 hours, or overnight if you wish.
*You may need to add a little more olive oil prior to serving it. Like I said, that Pasta will continue to absorb.
*Before serving, sprinkle with parmesan and top with sliced tomatoes if you want.


And lets bring it in for a close up


MMMMMMMMM!
 
Posted by Cambria

Thursday, September 5, 2013

Mushroom Risotto

Risotto
Is it hard to make?  

Pshhh.  
No.


"It takes a little bit of practice to begin with."
"There's a certain amount of concentration involved."
"Risottos are very sensitive to timing."
"Risotto is notoriously difficult to get right."

Whatever.

Do you have a spoon and if so, do you know how to stir?? If you answered yes, you too can make a beautiful, creamy risotto.

It's a whole different way of cooking short-grained rice.  By adding the liquid little by little, it makes it's own creamy sauce.  You add a little flavor and cheese and it's a savory sensation indeed!


Goes great with any grilled meat,  really good with pork or chicken, or is a yummy main dish all on it's own.

Mushroom Risotto

1 lb. mushrooms, thinly sliced (I used Portabello, Crimini, and white)
Olive oil
6 cups chicken broth
2 shallots, minced
1 1/2 cups Arborio rice
1/4 cup butter
1/2 cup grated Parmesan cheese

In a large heavy pot, heat a drizzle of olive oil.  Add mushrooms and saute until soft, about 5 minutes.  Remove and set aside.

Over medium heat, add another drizzle of olive oil to the pot, stir in the shallots.  Cook 1 minute.  Add rice, stir to coat with oil and toast until its a pale golden color.  

Heat broth, add 1/2 cup of broth to rice.  Stir and cook until absorbed.  Continue adding broth 1/2 cup at a time, stirring occasionally (contrary to popular belief, you really don't have to stir constantly) until the liquid is all absorbed and the rice is al dente.  Should take around 15-20 minutes.

Remove from heat, stir in mushrooms, butter and Parmesan.  Season with salt and pepper.  Serve on a heated plate or shallow bowl.


Tip:  Don't sub long grain rice.  It's not starchy enough to make a creamy sauce.  

Tip 2:  The broth is a guestimate.  Totally a 'see how it goes' thingy. You may need more or it may be all ready before you add the remainder of it.  Just test for doneness every now and then.

Tip 3:  If you really want to creamy it up even more, add a little cream or half and half at the end.

Tip 4:  Try adding a little truffle oil at the end - it will make it better than ever (not that this really needs any improvment!).


Can I just give a shout-out to shallots??  They are so flavorful!  Kind of like a mild onion with a hint of garlic but not in-your-face burn.  You can always use just onion and/or garlic but these really make it perfectly flavorful.


Enjoy!  
You know you will.

Posted by Rona

Wednesday, August 14, 2013

Sauteed Mushrooms (done right)

Black Angus Ribeye (medium rare) + Sauteed Mushrooms 
= an out of body experience.
I'm just sayin'...

Sauteed Mushrooms done right; not soggy, 
lightly caramelized and seasoned to perfection. 

I have secrets and I'm not afraid to share:

 Secret #1:  
Don't wash under running water.
Our fungi friends are quite absorbent and will soak up the water like a sponge.  End result will be soggy, boiled, steamy mushrooms. 

Instead, lightly wipe shrooms with a damp paper towel.  

  
Secret #2:  
Add garlic when almost done.  
Garlic burns easily.  Burnt garlic is nasty, bitter, horrifying. You'll want to saute these at a medium high/high heat which will kill your garlic way too early.


   Secret #3:  
Bacon grease.  
It will knock your socks off.  
It's a sock-knocker-offer.


Sauteed Mushrooms (done right)

2 packages mushrooms, washed and sliced
1/4 cup bacon grease (saved from last night's BLT's)
2 garlic cloves, mashed or finely chopped
salt and pepper
fresh thyme, if desired (about 1-2 T)

Heat skillet hot hot hot.  Add the bacon grease, when it's almost smoking, add the mushrooms and saute until golden brown, stirring frequently (but gently).  Add garlic, go another few minutes. Season with salt and pepper.  It's now a good time to add the thyme.

Option:  You can add a little butter for more great flavor, but do it after they are golden. 

Another Option:  If you don't have bacon grease, use Canola oil, and add butter at the end.  Won't be as good.  Don't say I didn't warn you.


Ever been to orbit?  
Pack your bags 'cause you're going there.


Posted by: Rona

Wednesday, July 31, 2013

Honey Roasted Sweet Potatoes


Need a side dish but are banning the beige??  

Oh honey, let's talk.  


Honey Roasted Sweet Potatoes


So you know when grandma said, "Leave well enough alone." and it almost sounded boring, depressing, sad?  

Here it is. Well-enough and it's nothing short of spectacular.


This recipe takes the natural beauty of the sweet potato and intensifies it, but still leaving a  pure, delightful taste.  

Let's face it, intensified anything is better.

It's like taking what the good Lord gave ya, and making it a little better, (kind of like mascara), but not a total unrecognizable transformation (like the Life-Style Lift).


Let us all eat orange today.


Honey Roasted Sweet Potatoes

3 pounds sweet potatoes
1/4 cup honey
1/4 cup olive oil 
juice of one lime (I have left this out when I don't have it)
salt

Peel and dice sweet potatoes into about 1 inch cubes. Or... slice into 3/4 inch slices.  Make sure that knife is sharp, raw sweet potatoes are like cutting into bricks, I swear.  And you might too while cutting these.

Mix oil, honey and lime juice into a Ziploc baggie. Toss in potatoes and shake around to coat. Put on a Pam sprayed cookie sheet. Give them room to breathe - you want these bad boys to roast, not steam. Sprinkle with salt.

Bake at 350 for 45 minutes, take out and turn over 1/2 way through the baking time, then turn up to 400 degrees and bake another 15-20 until tender and golden. (Keep an eye on these - cooking times vary so much, depending on the size of chunk, how many you cram on a pan, and your own oven temp.  You may not need to turn them up at all at the end.)

So.... I know you'll be tempted to turn the temperature up to 400 at the beginning to speed it up.  You know it works for regular roasted potatoes. Yeah don't do it.  With the honey, the increased temperature will cause a rapid progression of molecular over caramelization - they will BURN! So if you want the reputation as the sweet potato burner lady (or man), then go right ahead.


Posted by: Rona


Wednesday, June 26, 2013

Deviled Eggs

Everyone in our family loves deviled eggs!
  
They are so yummy, they scream SUMMER,  plus they're cheap and easy (like what's-'er-name down the street).  Back when we had 40 chickens and were getting 3 dozen eggs a day, I was always looking for more ways to use them.  Hence, if we weren't making German Pancakes or huge omelets, we were making these - always a staple at our summer BBQ's.
 
 
Deviled Eggs - straight from the 50's

First you hard boil some eggs. 

You want to do this right so you don't get that dark greenish-gray circle around the yolk.  That just screams rotten chicken fetus even though it's harmless.  I know there are some other ways to prevent this from happening, but I've always done it this way and it works every time. 

So place your eggs in a pan and cover with water (about an inch over the eggs).  Add some salt (helps with cracking). 

 Oh and here's some egg 101: If you're wondering how to tell if your egg is fresh or good, here's how:  When it's in the water if it lays flat, it's too fresh, won't peel and you'll have a disaster on your hands and will have to now make egg salad sandwiches instead.  If it floats to the top, it's bad, it's foul (no pun intended) there's to much air in it.  Gettarid.  But, if it tilts up slightly, it's perfect for hard boiling.

So, back to these highly difficult instructions, bring to a boil, turn down to a low boil and boil for 13 minutes.  If you live in a lower altitude (I'm about 7000 ft), you could dock of a couple minutes. Remove from heat, drain off boiling water and immediately fill with ice water and ice until cool.  That's the secret, and icy shock and you'll have perfect hard boiled eggs.  

Well that was hard.

It gets even harder.

When cool,  peel under cool running water, let dry on a clean dish towel and slice in half lengthwise.  Scoop out centers with a spoon into a bowl. Add mayo (Hellman's is always the best if you can find it), a couple squirts of mustard, not a ton, just enough to give it a little tang, and salt and pepper. 

Blend until smooth.  I usually put the filling in a large Ziploc bag with the corner cut off, sometimes a pastry bag with a big star tip and pipe into the shells.  I'd rather be generous and loose a couple whites than make them skimpy.  Sprinkle with paprika or Salad Supreme (my favorite) and garnish with a baby dill pickle slice. 


When we do these, we usually make about 2 dozen and there's never any leftovers.  So simple but so good!


Posted by: Rona

Thursday, June 20, 2013

Savory Polenta

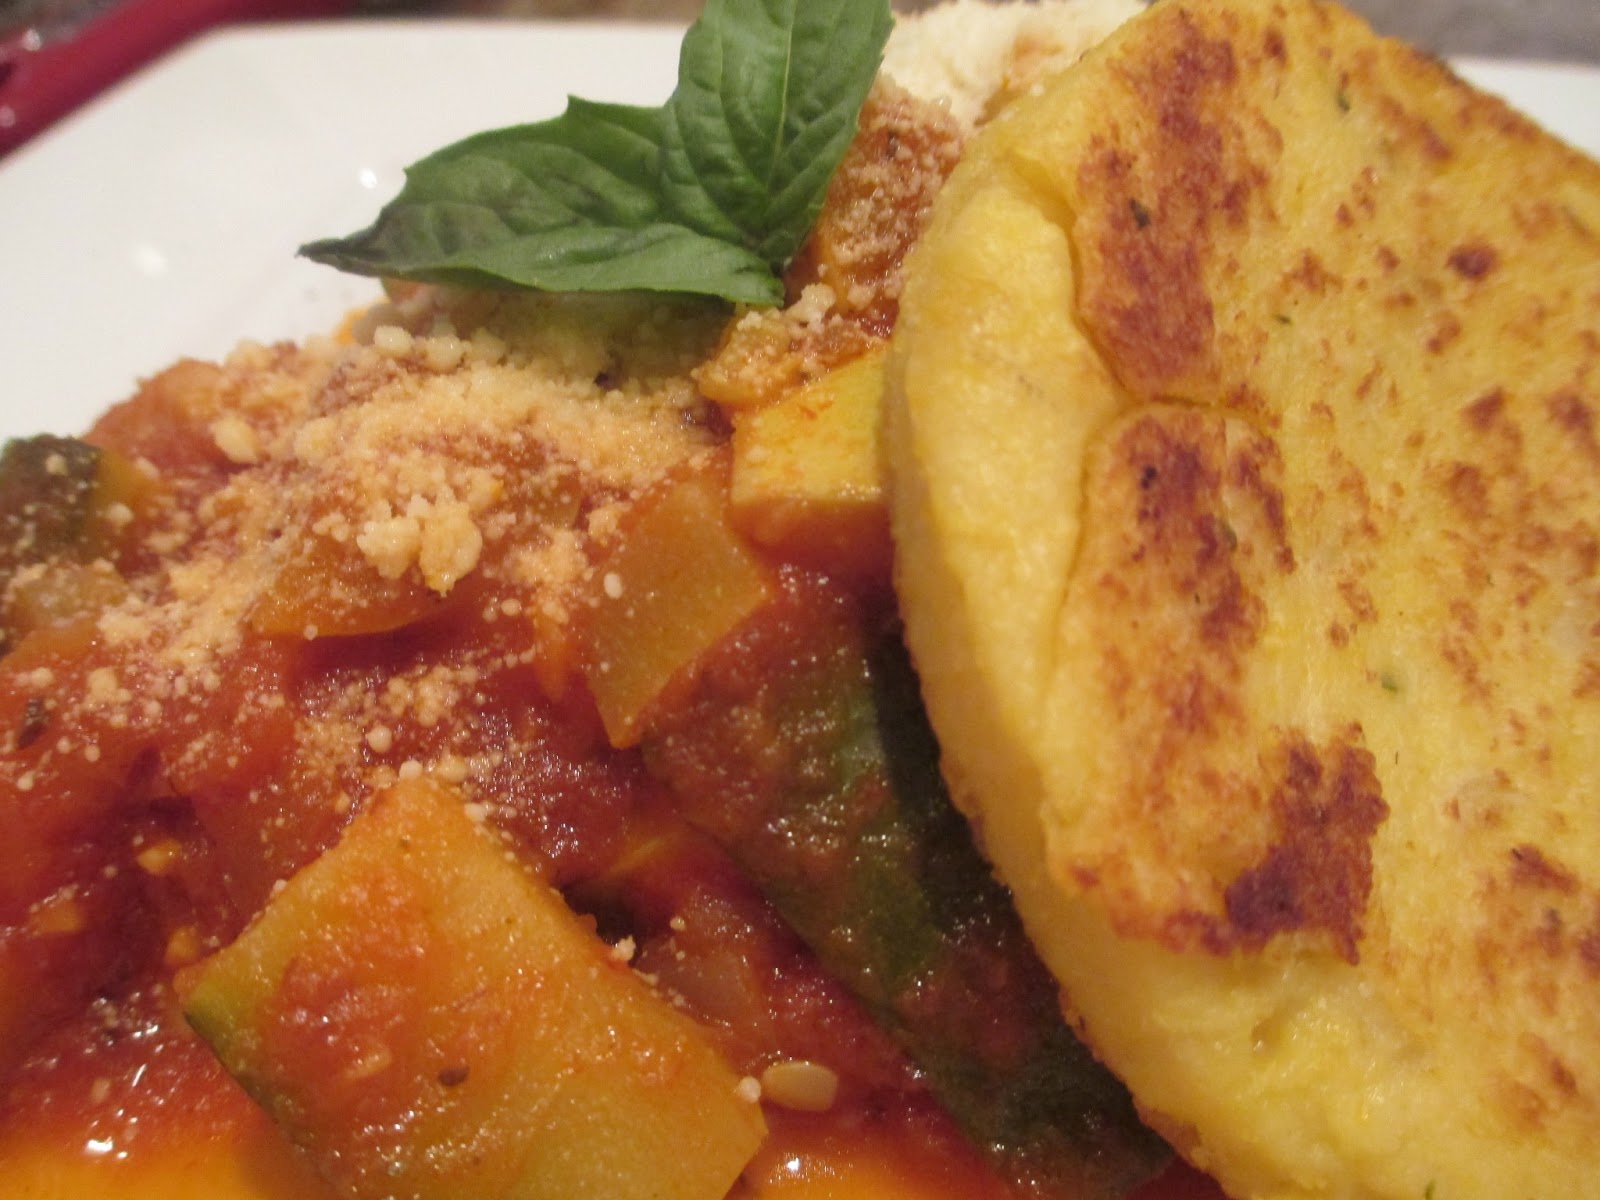
Ya don't be callin' this a cornmeal patty my friend. 

This is POLENTA.


And I'm hooked on it.  I first had it at a fancy schmancy Brazilian restaurant in Scottsdale and was craving it ever since.  After a decent amount of Googling, I opted on this recipe I got from Alton Brown off of Food Network.  And honestly, I change every single recipe I try but not this one. Well, except I will never use unsalted butter (totally unnecessary if you asked me), and I did use yellow onion instead of red, and I did add a little extra Parm,  and I didn't have any parchment paper, but other than that...


Savory Polenta:

2 T olive oil, plus more for frying
3/4 cup finely chopped red onion
2 cloves garlic, finely minced
1 quart chicken broth
3 T unsalted butter
1 1/2 t. kosher salt
1/4 t ground black pepper
1 cup coarse cornmeal
2 ounces Parmesan cheese, grated

Preheat oven to 350 degrees.  In a large, oven-safe saucepan heat the olive oil over medium heat.  Add the red onion and salt and sweat until the onions begin to turn translucent.  Reduce the heat to low, add the garlic, and sauté for another minute. 

Turn up the heat to high, add broth.  Gradually add the cornmeal while continually whisking.  Cover the pot and place in oven.  Cook for 35-40 minutes, stirring every 10 minutes to prevent lumps.

Once the mixture is creamy, remove from the oven and add the butter, salt and pepper.  Once incorporated, add the Parmesan gradually. 

Serve as is or pour the polenta into a 9 x 13 lined with parchment paper.  Place in the refrigerator to cool completely. 

Once set, turn the polenta out onto a cutting board and cut into squares, rounds, or triangles.  Brush each side with olive oil and sauté in a nonstick skillet over medium heat or grill.

I cut mine into rounds, mostly so I could eat the scraps. I swear it's worth taking it out of the oven every 10 minutes to stir.

Here, I served it with a roasted veggie spaghetti sauce. 

For that I took a zucchini, summer squash, onions, mushrooms, and an eggplant, diced 'em up, drizzled them with olive oil, sprinkled with salt, and roasted them in a 400 degree oven for about 20 minutes.  Then I added them to some spaghetti sauce I already had.  This here is actually served over baked spaghetti squash instead of pasta  So it's kind of veggies over veggies, (is that wrong?) but it was really good!

PS:  Don't leave out the Parmesan.  It was the crowning jewel.  It was the last flavor that combined with the others that put it over the top!


Posted by: Rona